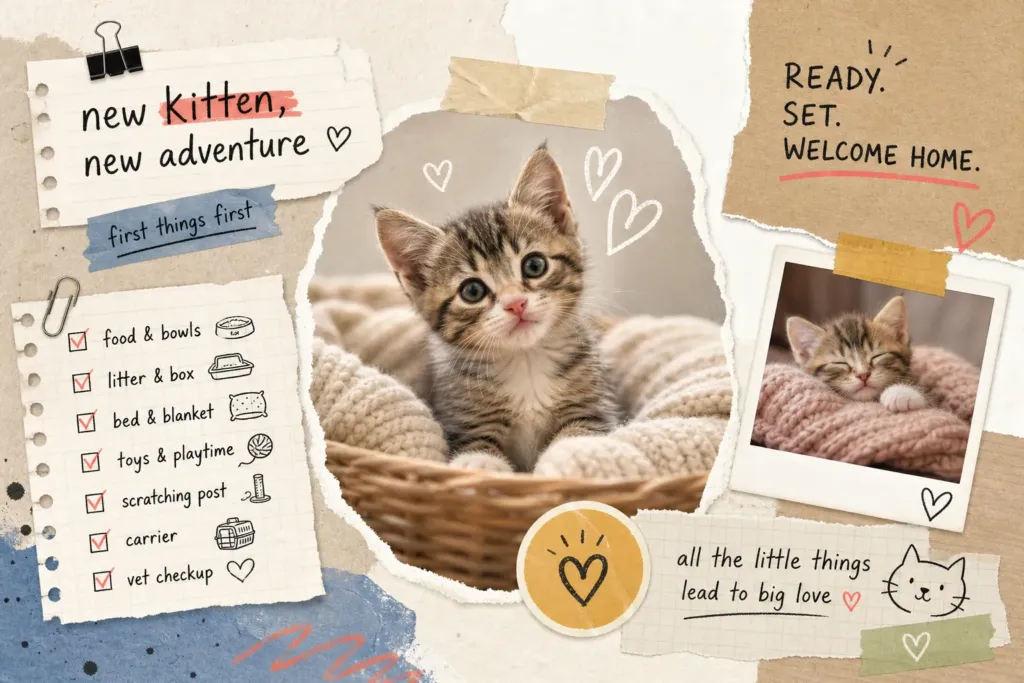
You’ve confirmed the pickup date, told everyone you’re getting a kitten, and now you’re standing in the middle of your living room wondering what actually needs to happen before that carrier arrives. The pet store aisle doesn’t help. Every product looks essential, and the internet sends you in fourteen different directions at once. The good news: most of the preparation boils down to five clear areas, and this new kitten checklist walks you through each one so the first week stops feeling like a crisis waiting to happen.
Work through these five areas in order: the supplies you actually need, how to feed a young kitten properly, setting up litter training, making your home safe, and knowing what to expect at the first vet visit. One more thing worth noting upfront: if you’re bringing home a kitten from a reputable breeder, you’ll typically receive a health certificate, vaccination records, and breed-specific care guidance from day one. That documentation alone eliminates a significant portion of the guesswork covered here.
New kitten checklist: must-have supplies before your kitten arrives
A common mistake first-time owners make is treating the supply run as an all-or-nothing shopping trip. Buying everything at once means spending money on items that may not suit your kitten’s personality or size. A smarter approach splits this kitten supplies checklist into two phases: what you absolutely need before the kitten walks in the door, and what you add over the following weeks once you know what you’re working with.
Day-one essentials you need ready
Before your kitten comes home, have these items in place. Start with kitten-formulated food, and if your breeder can tell you what brand the kitten has been eating, buy that exact food first. Switching food during an already stressful transition causes digestive upset, and an unsettled stomach on day one is a rough start for everyone. Add a shallow stainless steel or ceramic food bowl and a matching water bowl; both materials are easier to sanitize than plastic and are commonly recommended by vets for that reason.
For the litter setup, a low-sided open tray works best for small kittens who haven’t built up the strength to hop into a deep box. Use unscented litter from the start. A secure carrier doubles as a safe retreat if the kitten feels overwhelmed during the first few hours at home. Round out the list with a warm blanket or small bed tucked into a quiet corner, two or three basic toys, and a scratching post. Providing at least one scratching surface helps redirect natural scratching behavior away from your furniture.
First-month additions to buy as you go
Once you’ve lived with the kitten for a week or two, you’ll know whether you have a climber, a lounger, or a toy-obsessed sprinter. That’s the right time to invest in a cat tree, a second or third bed, a grooming brush, and nail trimmers. Spending on a large climbing structure before you know the kitten’s activity level is a common and expensive mistake. Add a litter scoop and a covered waste bin, a collar with an ID tag, and a rotating selection of enrichment toys to keep things interesting. A pheromone diffuser is worth considering if the kitten shows signs of ongoing anxiety after the first week.
How to set up food and a daily feeding routine
Feeding a young kitten isn’t complicated, but it does require more structure than most new owners expect. Leaving food out all day, a method that works for many adult cats, doesn’t serve kittens well at this age. Structured meals support stable energy and make it much easier to spot changes in appetite early.
Meal frequency for 8- to 16-week-old kittens
Kittens between 8 and 12 weeks do best on four small meals per day. Their stomachs are small, their metabolism runs fast, and spreading meals throughout the day keeps blood sugar stable. Around the 12- to 16-week mark, three meals per day works well for most kittens. The simplest way to determine portions is to use the daily feeding chart on the food packaging, based on your kitten’s current weight, then divide that total across the day’s meals.
Weigh your kitten once a week during the first month. Steady, lean weight gain is the goal. Rapid weight gain and stalling are both worth flagging with your vet. A digital kitchen scale works perfectly for this; it’s one of the most practical tools you can have during the early weeks.
Wet food, dry food, or both
Wet food is the stronger option for young kittens. It provides hydration, it’s easier for small mouths to chew, and it’s easier to portion accurately. If you offer dry food as well, measure it rather than leaving the bowl full throughout the day. Kittens at this age gain weight quickly and will overeat if given the chance. Using wet food as the foundation and dry food as a supplement, rather than the reverse, supports both hydration and portion control.
New kitten checklist: litter box basics and quick-start training
Litter training is one of the areas that intimidates new owners most, and it really shouldn’t. Cats are instinctively inclined to use a designated elimination spot, and most kittens catch on within a few days when the setup is right. Your job is mostly to make the box easy to find, pleasant to use, and reliably clean.
Setting up the box for success
Choose a small, open-top, shallow box for kittens under 12 weeks. Covered boxes look tidy but feel confining to young kittens who aren’t yet comfortable with enclosed spaces. Place the box somewhere quiet and accessible, away from the food and water bowls, and easy to reach from wherever the kitten sleeps and plays. For the first week, confining the kitten to one room with the box in it makes the habit form faster. A commonly recommended guideline is one litter box per cat plus one extra; in larger homes, distribute boxes so one is always within easy reach.
Teaching the routine and handling accidents
Timing is everything. Place the kitten in the box after every meal, after waking from a nap, and during or after active play. Those are the moments when elimination is most likely. To help the kitten understand what the box is for, gently scratch the litter surface with your fingers when you set the kitten down; the scratch-and-sniff response is instinctive, and it works. Follow a successful trip with calm, quiet praise right away.
When accidents happen, clean the area immediately with an enzymatic cleaner. Regular household cleaners don’t fully break down the scent markers that draw a kitten back to the same spot. Never punish the kitten for an accident; that reaction increases anxiety and makes avoidance worse. If the kitten repeatedly chooses one specific spot on the floor, temporarily move the litter box to that location while retraining, then gradually shift it back toward the preferred spot over a few days.
Kitten-proofing your home room by room
Kittens explore with their mouths, their paws, and a complete disregard for height. Before your kitten comes home, get down at floor level in each room and look for anything that dangles, rolls, tips, fits in a small mouth, or contains a chemical. The hazards fall into two main categories: the kitchen and bathroom, where the density of dangers is highest, and the living spaces, where electrical cords and small objects create a different set of risks. Think of this step as your kitten-proofing checklist, work through it room by room before bringing home a kitten.
Kitchen and bathroom: the highest-risk rooms
The kitchen holds more hazards per square foot than anywhere else in the home. Always check inside the washer, dryer, and oven before closing or turning them on. Move household chemicals from under the sink to a locked cabinet or a high shelf. Switch to a lidded trash can that the kitten can’t open. On the stove, use knob covers or remove knobs when not cooking to prevent accidental activation. The bathroom adds its own risks: medications, cleaning products, and an open toilet. Keep the toilet lid down at all times, and treat the bathroom medicine cabinet and cleaning cabinet the same way you would if a toddler were in the house.
Living spaces, cords, and hidden dangers
Living rooms, bedrooms, and home offices share a common category of hazards: electrical cords, charger cables, rubber bands, hair ties, plastic bags, and small decorative objects. These items can cause intestinal blockages and, in the case of long strings or cords, strangulation. Cord covers and cable tubing solve most of the electrical hazard. Switch to cordless window blinds or secure dangling cords out of reach. Anchor bookshelves and tall furniture with anti-tip straps, and check recliners and sofa beds for pinch points before lowering or folding. Move any toxic houseplants completely out of the home rather than just relocating them to a higher shelf; determined climbers will find them.
Your kitten’s first vet visit: what to expect
Schedule the first vet appointment before or within a few days of bringing the kitten home. Don’t wait until something seems wrong, the first visit establishes a wellness baseline, and the earlier it happens, the sooner you have a vet who knows your kitten’s normal. This is one of the most important steps on any first vet visit for kittens guide.
What the vet checks during the exam
The standard wellness exam covers weight, temperature, eyes, ears, mouth, skin and coat, heart and lungs, and abdomen. The vet also checks for fleas and ear mites. A fecal exam for internal parasites is routine, and the vet will typically discuss FeLV and FIV testing at this visit. Bring your kitten’s health certificate and vaccination records in the carrier with you. Reputable breeders, including Kitty Palace Cattery, send kittens home with this documentation already in hand, which allows the vet to review the vaccination history immediately rather than starting from scratch. It makes the appointment faster and more productive.
Vaccination and deworming schedule at a glance
The core vaccine series for kittens follows a predictable timeline. Here’s what the standard schedule looks like:
- 6 to 8 weeks: first FVRCP vaccine, fecal check, deworming if needed
- 9 to 11 weeks: second FVRCP, deworming continued as necessary
- 12 to 14 weeks: FVRCP booster, rabies vaccine, possible FeLV start
- 15 to 16 weeks: final FVRCP to complete the kitten series; second FeLV dose if the first was given
Your vet’s exact schedule may vary slightly depending on local regulations and the kitten’s individual health status. The consistent goal across every clinic is to complete the core series by 16 weeks. Book that first appointment now. Don’t wait until after the kitten settles in.
New kitten checklist summary: you don’t have to get it perfect on day one
Working through this new kitten checklist before your kitten arrives gives you a real head start. You have the supplies that matter most, a feeding routine that prevents guesswork, a litter setup designed for success, a home that won’t send you to the emergency vet on night two, and a clear picture of what the first few vet visits will look like. None of it needs to be executed perfectly from the first hour. The essentials carry you through the first 48 hours, and the routine builds naturally from there.
One of the biggest advantages any new owner can have is starting with a kitten from a responsible breeder who provides vaccination records, a health certificate, and breed-specific care guidance from day one. Kitty Palace Cattery sends every kitten home with that documentation already in place, so if you’re still in the process of choosing a kitten, that level of preparation is the standard worth looking for. Print this new kitten checklist, tick off each section before pickup day, and you’ll be ready.
Frequently Asked Questions
Before day one have kitten-formulated food (ideally the same brand the breeder used), shallow stainless steel or ceramic food and water bowls, a low-sided open litter tray with unscented litter, a secure carrier that can double as a retreat, a warm blanket or small bed in a quiet corner, two or three basic toys, and a scratching post.
Buy big-ticket and optional items after a week or two so you can match them to your kitten’s activity level. Examples to add later include a cat tree, extra beds, a grooming brush and nail trimmers, a litter scoop and covered waste bin, a collar with an ID tag, and a rotating selection of enrichment toys; consider a pheromone diffuser only if anxiety persists.
Kittens 8–12 weeks old do best on four small meals per day because of their small stomachs and fast metabolism. Around 12–16 weeks most kittens move to three meals a day; structured meals help stabilize energy and make appetite changes easier to spot, so avoid free-feeding.
No — if the breeder can tell you what brand the kitten has been eating, buy that exact food for the first days. Switching food during an already stressful transition often causes digestive upset, so keep the diet consistent at first and transition slowly if you need to change brands later.
Use a low-sided, open tray that a small kitten can step into easily and fill it with unscented litter from the start. Place the tray where the kitten can find it easily; later you can add a scoop and a covered waste bin once habits are established.
Provide a quiet corner with a warm blanket or small bed and keep the secure carrier available as a safe retreat if the kitten feels overwhelmed. Also supply at least one scratching post to redirect natural scratching behavior away from furniture and monitor spaces for obvious hazards while you settle in together.
If you’re getting a kitten from a reputable breeder you’ll typically receive a health certificate, vaccination records, and breed-specific care guidance from day one. That documentation covers much of what the first vet visit will review and removes a lot of guesswork about immediate health and care needs.